
“Pilot Academy” – How to Use an HDMI De-embedder With Your Pilot
(Using an HDMI De-embedder to Simultaneously Connect Your Pilot to a Display and a Separate Audio Output Source.)
Welcome to the Pilot Academy, where we’ll cover tips and tricks to get the most out of your Pilot. As a teacher, there are thousands of things beyond your control, and your classroom audio/video configuration is often a major one. As you probably know, the Pilot’s HoverCast system can wirelessly connect to any display that has HDMI input, but what if you’re in a situation where your interactive display is separate from your audio output speakers (such as with a sound bar or surround sound system)? Fear not! You can connect your Pilot to a display screen and a separate audio output by using a simple device called an HDMI de-embedder.
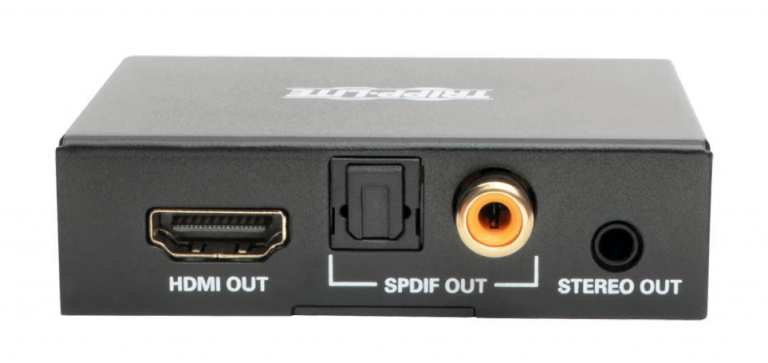
When you connect your HoverCast receiver to your display, both the audio and visual data is sent through a single HDMI cable (the touch data is sent separately through the HDMI touch cable). An HDMI de-embedder allows you to take that data and separate the audio from the video. Once the signal has passed through the de-embedder, you can send the audio signal to one device and the video info to another. You can use any de-embedder to do this (the Tripp Lite P130-000-AUDIO is a good option.)
Luckily, setting this up is as easy as 1-2-3.
Step 1: Using an HDMI cable, connect your HoverCast receiver to a de-embedder’s “HDMI in” port.
Step 2: Use a second HDMI cable, connect the HDMI de-embedder’s “HDMI out” port to your flat panel.
Step 3: Using your sound system’s input cables, connect one of the HDMI de-embedder’s “audio out” ports to your sound system’s a/v receiver (such as an Onkyo TX-8020 Stereo or Marantz NR1608 Receiver.)

Then viola! You’re all set to operate your Pilot as usual. The only difference is that your audio will now be outputted and controlled by your separate sound system, not your CenterStage. Just another example of how your Pilot can integrate into your classroom’s pre-existing interactive flat panel configuration.